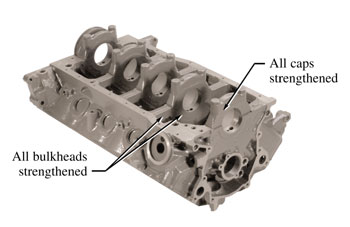
 Ford Racing Sportsman Block
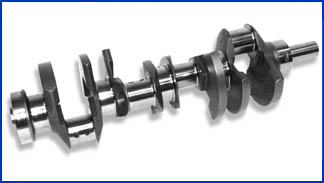 SCAT 4340 forged
lightweight crankshaft.
SCAT 4340 forged
lightweight crankshaft. General - Canfield Heads - CP Pistons - Accel DFI Intake - Pauter Rods - T&D Rockers - Assembly - Other Parts - Cam - Dyno Results
There has been a change in plans. I will be using a FRPP Sportsman block (part number M-6010-B50) instead of the high-nickel stock roller. Don Redmon, of Replika Maschinen was not impressed with the high-nickel block. His comments had to do with bolt sizes and such.
|
Ford Racing Sportsman Block |
SCAT 4340 forged
lightweight crankshaft. |
|
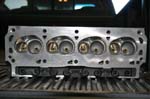
Canfield Cylinder Heads
|
|
|
SMALL BLOCK FORD As Cast:
|
20450-58-0-B
|
|
Intake Valve Size:
|
2.02
|
|
Exhaust Valve Size:
|
1.60
|
|
Intake Port Volume:
|
192
|
|
Chamber Volume:
|
58
|
|
VALVE LIFT
|
.100
|
.200
|
.300
|
.400
|
.500
|
.600
|
.700
|
|
Intake Port
|
70
|
150
|
203.5
|
242
|
261.5
|
272
|
274
|
|
Exhaust Port*
|
54
|
102
|
132
|
171
|
190
|
201
|
207
|
| These are typical flow numbers at 28 inches of water measured
on a SF 600 bench by an independent shop. *Exhaust flow numbers are without a pipe. |
|||||||
| Raw | 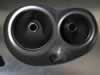 |
 |
|
|
|
|
|
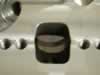
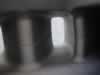
Sorry about the fuzzy pictures. Next time I'm using a tri-pod. |
The porting work is being done by Replika Maschinen, in Santa Clara, CA. Don Redmon is an artist. You should check him out for your next project.
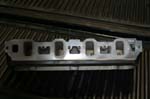
Head Porting Progress
|
|
|
| Things are looking pretty good. These are just the "roughing in" stages. | |
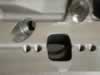
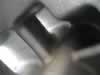
Head Porting Progress
|
| Here are some shots of the heads. They are not complete yet. The polishing still needs to be done as do the valve seats. | ||
|

|
|
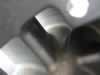
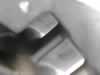
Head Porting Progress
|
| Wow!!! It's been a long time since I had any news on this part of the project, hasn't it? | ||
|
|

|
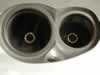
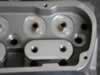
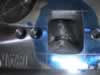
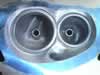
| The black is not paint, it's heat dispersant coating. They did a really nice job putting it on, don't you think? | What do you think of the polish job? You can almost see yourself in the bowls. | Mirror finish on the exhaust port to help the gasses get out quickly. Nice clean intake ports as well. |

|
|
|
| You can sorta imagine you are the hot spent gasses leaving. Exit this way.... | Now you can pretend you are the fresh intake charge coming in. | The intake side of the head. |
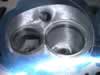
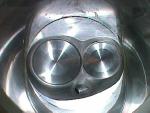
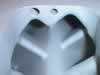
Head Porting Progress
|
 |
|
Here we have a shot of the completed combustion chamber. The
valve job is done and the heads are ready to be bench flowed today. I'll
post the flow numbers just as soon as I get them.
|
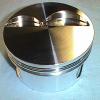
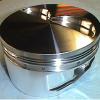
CP Pistons
|
|
|
|
These pictures were taken late at night, but show you
what the pistons look like as they came from CP. I don't know
about you, but I think the look pretty sexy. :-D
|
|
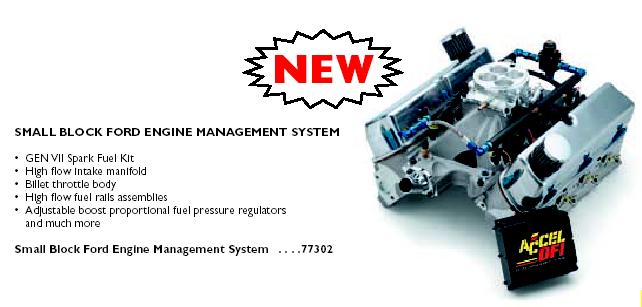
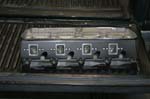
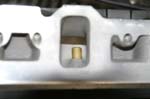
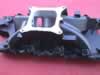
Accel Intake Manifold
|
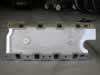 The bottom |
 The front |
 The top |
 Looks like a pretty good casting to me |
 #1 Runner |
 #2 Runner |
 #2 Runner |
 #3 Runner |
 #3 Runner |
 #4 Runner |
 #4 Runner |
 #5 Runner |
 #6 Runner |
 #7 Runner |
 #8 Runner |
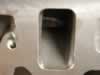
 View of a port |
Again... the porting work is being done by Replika Maschinen, of Santa Clara, CA.
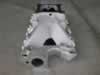
Intake Porting Progress
|
| Here is a shot of the rough-in stage on the intake porting. | 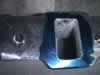 |
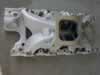
Intake Porting Progress
|
|
|
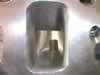
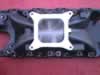
Here are a couple shots of the completed intake. It has been coated with a heat dispersant on the top and an oil shedding barrier on the bottom.. | ||
|
|
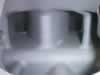
Here are a couple of shots of the plenum. That is not a coating you are looking at. That is just the way the aluminum looks when they are done with it. | ||
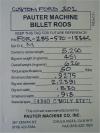
The Connecting RodsFrom Pauter Machine |
 |
||
| At long last, the connecting rods are finally in. There was some confusion during the ordering process that delayed things quite a bit, but the end result is the rods finally showed and thy are beautiful. These are the only set of Pauter rods for a V8 application in existance. | ||
 |
||
| Not an "H" beam, not an "I" beam... | Here's the small end, up close. | The stamping. Ooooh... |
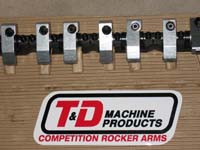
T&D MachiningCompetition Rockers |
| June 30, 2004 The rockers showed up. |
||
 |
 |
 |
|
I ordered on the 14th. It only took them two weeks to make them and deliver them. I am really impressed with the level of service. These rockers are 1.70 ratio. If you look closely you can see this stamped into each rocker arm. |
||
Elgin CamsHydraulic Roller Cam |
 |
| This is the cam card for the Elgin hydraulic roller cam that we replaced. The power from this cam was phenominal, but the lifters could not keep up with it. You can see the dyno results below. I am replacing this cam with a solid-roller unit. There will be more details on the new cam soon. |
Engine WorkBuilding a 327 Stroker |
| The machine work on the engine has finally started. I will post pictures and commentary in this section as I get it. | ||
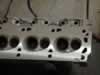
| About June 15, 2004. | The block with the ARP studs and Canton brace installed, waiting to be align honed. | 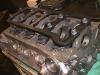 |
| August 3, 2004 | The machine work is complete. Here is a shot of the mock-up of the crank. As you can see, the block has been coated with the same thermal coating that went on the heads. | 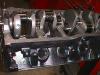 |
September 11, 2004 The assembly starts in earnest. |
Here you see the cam being installed. | 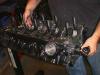 |
| The cam is in place. | 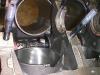 |
|
| The crank is prepared. | 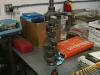 |
|
| The crank is now in place too. | 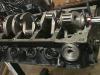 |
|
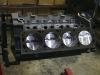
November 24, 2004 |
After much delay for various reasons, the pistons are finally in the engine. I now have a short block. | 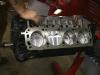 |
 |
||
December 25, 2004 The assembly continues. |
The heads are on... | 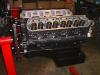 |
| These T&D 1.7:1 rockers look like serious stuff. I expect they will keep things nicely lined up. | 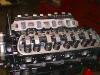 |
|
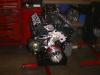
| The "stealthy" look... Black on black on black, with just a bit of aluminum to set it all off. Will it look better with a polished alternator, or this nice black one? Hmm... I need to change the pulley on the alternator out for a polished piece, regardless. |
 |
|
 |
||
| We didn't want to use the stock-style lifter guides, so Chris picked up a "retro kit" from Comp Cams. | 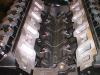 |
|
| March alternator bracket. | 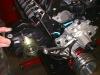 |
|
The Other Parts |
Dyno Results |
 |
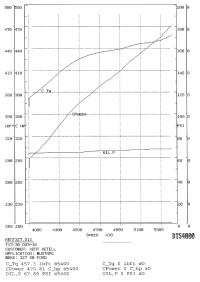 |
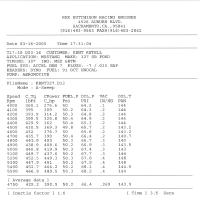
| Here you see the textual report and the graphical diagram from the last pull of the day (Mar 16, 2005). We had to put a hard-stop at 5500 rpm because the valves appear to be floating starting at about 5800. We suspect the valve springs are too weak and will find tomorrow. Please note that there is not even the slightest hint of a curve to the HP graph, which means there should be quite a bit more power in the engine, and we are already seeing 490hp at 5500. We did a pull that went to 6200 and had 610hp there, so fixing the valve float may net another 100hp. | |
Dyno Results |
 |
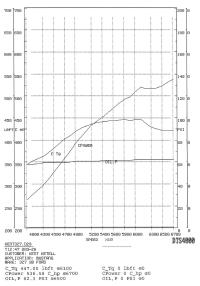 |
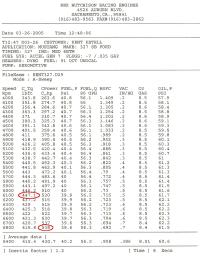
Here you see the textual report and the graphical diagram from the last pull of the day (Mar 25, 2005). The hydraulic cam and lifters were pulled out and a solid flat-tappet cam and lifters installed. I'll get the cam card and post it later. As you can see, we still don't know where this little puppy is going to actually stop making power, but at least we found the torque peak. There is a spike at 6100 that we will tune out later. The engine is going to Dan's shop for breather bungs on the valve covers and then it's into the car it goes. This beast should be a fun drive. |
|
![]()